Sunday, November 7, 2010

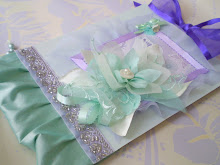
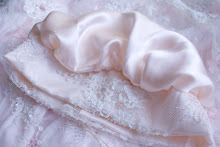
coming soon.. .


with lots of loveliest thoughts for a beautifully surprising day!!!

Thursday, October 21, 2010

~ a cuff! ~


Hello lovelies!!!


i finally put one of these beauties together, im so excited :)
& the good thing is all these components can be used for other projects as well!!!


you need:


start by folding the fabric into 4 equal parts
if you like you can make a flower template& pin it on, but i usually just cut it freehand, that works too.. .


once thats done, pinch all the flower shapes in from the centre,
i usually start with one then add each layer.
use about 30cm of thread{or embroidery floss}.
leave half of your thread as a tail & make two tiny stitches through the base that you're pinching, to make an x shape. that should secure the entire flower & give it room to move,


then tie a couple of knots at the base, leaving the ends long


set that aside for a moment & make a small bow in the middle of the length of fabric{or ribbon}


gather the two tales & make another, longer bow


so you end up with four loops in all{or you could cut an even longer piece of fabric & continue tying the tails into bows to make as many loops as you like}
then sew the flower onto it with one of the long ends,
& because the fabric is hangong long, i left the ends of the thread long too.


this could easily be turned into a little brooch or special adornment at this point.


now get the elements for the actual cuff.. .
i used a length of wide velvet ribbon & a length of lace edging


you can cut the lace & turn the back to face the front :) or leave it doubled over & glue/stitch them together{adding a loop in between at one end-just a little rectangular cut length of fabric} & sewing on the button at the other end.


stitch the flower "we prepared earlier" on :) & hooray, you have something so lovely to wear!!!


sweet thoughts

Sunday, October 10, 2010

a handbound book.. .


1. gather an assortment of wonderful papers together & arrange in a haphazard style pile
2. fold, then clip together with a bulldog clip
3. poke 5 holes through the spine{i begin with the centre hole right in the middle then work outwards with even spaces} i use an awl but you could use your needle, a metal skewer from the kitchen etc
4. sew with an ample piece of thread, either waxed linen or embroidery floss, or twine {pull fairly tightly & flat along the line you're sewing so the paper doesn't tear}
5. write/paint/draw till your heart's content!!!

Have a sunshine-in-your-heart kind of day{since its raining here}!!! :) loveliest thoughts

Wednesday, September 29, 2010

~ a journal in use .. .


"A book is like a garden carried in the pocket."


before.. .


& after ~


where hopes & dreams abide


& quotes & maps nest.. .


the days journies appear on its pages,
alongside the hearts questions ~


changing words to be more meaningful
{from home-extraordinary furniture, to, home-extraordinary future}


~ a dream of mine ~ {i painted this page then wrote/drew/glued flower shapes on it}


the beauty of these little journals is that they can travel with you during the days necessities, like carrying a dream in your pocket!!! precious dreams

Saturday, September 25, 2010

paper bag journal ~ pamphlet style binding


you will need:
- a needle, i use a matress needle, its the massive one in the needle packs from the supermarket :)
- thread, i used embroidery floss
- your little booklet/journal
im showing you without the paper bag cover, because it was easier to photo, then i re-sewed it with the cover intact, so please don't be concerned with the photos...take everything we assembled on the last tutorial, that is the paper bag cover, & paper inserts, lay it flat{the paper inside the cover} & clip it all together with a bulldog clip{to hold it together, i didnt do this so mine went a bit wonky at first :) }


then thread your needle {if you like you can use wax or just run the embroidery floss along the top of a glue stick to strengthen it, but i only used 6 double pages inside-24 back & front, so i thought the floss should be strong enough without glue or wax}


& make a hole in the middle of the centre fold, threading the needle through the entire booklet...usually bookbinders use an awl, but i found that the needle went straight through as its not a heavy weight booklet.


go down & thread back through about an inch or two from the bottom of the journal


then take the needle right up to the top & thread it through about an inch or two from the top...


thread it back throgh the beginning hole


mak sure the two tails are on opposite sides of the thread, & then tie...& voila!!! a journal, made by you!!!

have a wondrous day!!!