Monday, June 28, 2010

time for a giveaway!!!


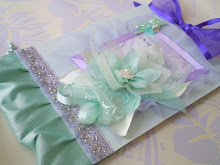
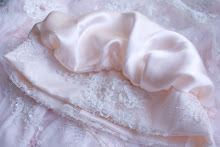
a journal bound with silk & edged in french beaded lace, a place to line with your thoughts/dreams/wishes/hopes/ponderings/experiences/days of loveliness...

feel so welcome to leave a message on this post if you haven't won a journal from me before, & i'll draw a winner next Friday...loveliest thoughts

Saturday, June 26, 2010

dangling postcards ~


something i've been wanting to do for a long time...
step 1:
gather postcards, photos you've taken, pages from books
{i was so excited to find these Anahata postcards in Mombasa the other day, i also used some i'd been saving from the bowerbird stories at finders keepers last year}
step 2:
also collect scissors, string/lace/ribbon, a hammer & eyelets-i like to get the gold eyelets from Spotlight because they're only about $3 & come with the tool, sticky tape...
step 3:
deign the layout lengthways & also decide what you will layer on the back


step 4:
lay the two papers back to back{sometimes you will only need the one if it is coloured both sides} & poke a whole with the scissors in the top & bottom


step 5:
place the eyelet through the pages & hammer firmly until secure
step 6:
tie together with bits of ribbon
step7:
sticky tape to the roof
{you could stick a fabric flower or bow at the top to cover the tape}
step 8:
enjoy!
:)


i'd like to write quotes on the back of mine where i've used blank paper...


i also want to make a photo chandelier with photos of the family & attach the layers around a few gold hoops...
hope you have a lovely weekend!!!

Thursday, June 10, 2010

a box of beautiful


you will need:
{a} matchbox/s
pretty paper
paint & paintbrush
scissors
tissue paper
glue


first of all paint the inside of the box...


then cut alog the top right edge of the outer part


& cover it with patterened paper. then glue the middle in so it opens like a book.
{i also cut a rectangular piece of tissue paper which i inserted between the bottom layers to add a dainty texture}


i made little books to go in.
you could either cut a book & fold it straight in half, or score along two lines in the middle to make a spine.


cut or tear out some pages for the book


& staple right in the centre of the spine {i like to put the staple so the straight part is on the outer edge}


i embellished with words from a dictionary i once found in a drawer


& then cut some french lace for the front & made tissue paper flowers{which sort of look like crowns}


i added a little brad to fasten{i couldnt find the right colour so i painted them}
& attached a length of ribbon to hold it closed...


...a little box that holds a lot of sentiment!!! lovely thoughts

Tuesday, June 8, 2010

~ buttons galore!


Hi everyone!

i thought you might like this fun & versatile idea... of collecting buttons & creating sort of a button collage!

first, lay them out on a piece of paper, to make sure they are placed in the design you most love.


then stitch them on :)

Tuesday, June 1, 2010

Ojo de Dios{Gods eye}

remember making these in school?

these are a smaller version...very small, with toothpicks :)
you will need:
toothpicks
embroidery floss or twine
beads
glue


begin by crossing the toothpicks into a diamond shape. then follow these instructions, or
dab a little glue in the centre & begin winding the thread about 4 times one direction, then swap & wind about 4 times on the other diagonal opening.
after that, begin at one stick & wind under & loop over, wind under the next one, loop over it, wind under the nest loop over...there are better instructions here but maybe these photos might help


once that is finishe tie it off & maybe add a bit of glue to keep it in place. then glue some sparkly beads onto each point of the tootpicks.


finally, tie a little string, ribbon, or fabric strip on so it can be hung up as an ornament


may your days be full of rainbows!!!

a special box


a place to organize needles & keep emerging artwork...
you will need:
a wooden box
paint & paintbrush
coloured paper & scissors


paint the box


cut out some papers in alternating colours{or use the same one if you prefer!} the same size as the compartments & glue them down


fill with special things


lovely thoughts

Thursday, May 27, 2010

an embroidery hoop~with pocket


you will need:
an embroidery hoop
fabric {for the hoop}
alternating/complimentary fabric {for the pocket}
a needle & thread
beads & crimp beads {for the hanging attachment}
paint & paintbrush {if you want to paint the hoop}
& if you want to put a bouquet of flowers in:
fabric {for the flowers}
& toothpicks {for the stems}
& glue :)


carefully paint the outside & front
well, any part that will be seen. because my fabric was lace, i also painted the inside of the inner hoop & the front of it as well


make sure the fabric is snug
& place the pattern of symbols where you think they will stand out or look the nicest


roughly cut the shape of a pocket. for a more crisp look, cut one side to the shape you like, then fold in half & cut around to even


then fold the top down, placing the backs of the fabric together.

then sew a straight stitch across & gather the top of the pocket, so it kind of puckers up femininely


tie that off so it holds & continue to straight stitch around the edge of the pocket {without folding a seam} so you can pull it into a gather at the end.
the pocket can now be sewn onto the embroidery hoop, i just stitched in a few places because of the delicacy of the material.
~ also, i felt like there was too much pocket material sagging so i pinched some up towards the top & stitched it into a sort of a double collar for the pocket. then i rolled up a tiny scrap of material into a log & tucked it doen the bottom of the pocket to help it keep its shape.


next add the contents to the pocket, either a sweet little book, note tied with string, or fabric flowers{on a toothpick}.


then embellish the outside of the pocket with some more lace & a ribbon


be imaginative with the little flowers


add embellishments as you desire


& then you'll have somewhere to keep special things...


hope you all have a lovely week!!!