Thursday, May 6, 2010

personalized sillhouettes ~

sillhouettes are very much in vogue right now, & they are fairly easy to create & use to adorn the home as pieces of personalized artwork!!
all you need is a camera, & some alternating papers{colours that contrast so the sillhouette pops} or you can get more detailed & add embroidery etc...


start by taking a photo of you or your family as a profile shot. this then becomes your template for your artwork. of course, as with any art, creative license is yours & you can change features like your hair as you choose. basically just print it out, resize it if you like, trace it & cut it out :)


this piece began as an embroidered sillhouette {chain stitch} & just kept growing...a few petite flowers, ruffles, beads, bows & bits of lace cut of a hanky were used to make up the hair, & some embroidery under the actual sillhouette. i also added some tulle tied into a makeshift bow with some sparkly adornments glued on top.


a simple sillhouette framed with some scrapbook paper can be beautiful & effective.


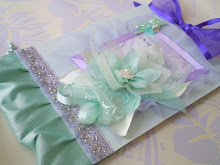
or for the sillhouette on the petite green book, i ruffled a scrap of fabric into an Elizabethan collar & cut out some paper flowers to complete :)


& there you go :) personal sillhouettes...have a beautiful day!!! lovely thoughts

Tuesday, May 4, 2010

a beautiful bookmark


you will need:
embroidery thread
beads
glue

first cut a length of embroidery thread a couple of inches longer than the book you'll use it in. i like to run the whole length of it over a gluestick to make it a little stronger.


then i glue the ends & twist them to a point with just a tiny bit of glue.


thread the beads on one end before you tie any knots. my beads were a pink pearl & rose quartz. let them run into the middle of the thread & tie a knot as close to the end as you like.


then push the beads back close to the knot & tie a knot at the other side of them, to keep them in place.


& then you can enjoy your lovely creation!!!

a little book

you will need:
a 12" x 12" piece of cardstock {plain or patterned}
a small scrap of cardstock{approx 3" x 8"~thats just a guess!}
scissors
glue
ribbons
embellishments{a scrap of fabric, some paper flowers, a paper sillouette}

Begin by folding the 12" x 12" cardstock in half, then folding each side in half, so there are 4 creases horizontzlly. then fold in half vertically, & fold each half in half, so your paper ends up looking like this...


cut along where i've shown you{i made a mistake & had no to sticky tape mine while i was figuring out the pattern :) }


accordian fold beginning at the top lefthand square, start folding the end square up towards the next one, so that when the paper is flat, lift the top left end square upwards & close it down on the next one as though you were closing a book


once its accordian folded properly the inside of the book will be complete except that you will notice where the back of the pages need to be glued together because otherwise it wont be sturdy {for example the back of squares 2 & 3 will end up being glued, as they become part of the same page.}


then trace around the bookpages, leaving about half a cm for the cover to overlap.
leave 2cm for the spine as well, so as you trace its, cover ~ spine ~ cover.


cut out the rectangle & score along each of the markings for the spine so its easy & crisp to fold, then fold :)


put glue on the two pieces of ribbon.
then glue in a square around the two portions of the cover, but dont glue the spine

\
& voila! a little place to record thoughts, sketch ponderings, paste photos & bits of lace.


lovely thoughts!!!

Monday, May 3, 2010

a little preview...


its been difficult to squeeze in time


but as soon as i can


i'll share these :) precious thoughts

Wednesday, April 28, 2010

a dress.


have you ever considered making a dress/costume entirely from paper or recycled products?


last year i made one for my sister.


i asked her if she liked wearing it & she said, "it didnt matter if it was just paper, it felt like a wedding dress" :)


instructions to make:
compile a large supply of brown paper bags, old newspapers, etc
& cut, paste & tape till your hearts content :) loveliest thoughts

tutu wreaths 2! :)

Hi lovelies!!! life has been jam-packed so here are a few examples of some older tutu wreaths i've made in the past...

a peace dreamcatcher :)


& a pink one!


have a week filled with prettiness!!! loveliest thoughts

Friday, April 9, 2010

A tutu wreath Tutorial :)


you will need:
fabric{either tulle or cheesecloth}
lace & embellishments{optional}
beading/craft wire
pliers

Cut a length of wire. cut some strips of fabric. gut out some contrasting petals{either lace or a different coloured tulle/fabric}.

On the end of the wire, twist a circle, so that the fabric will stay. Then fold the strip of fabric in half{i usually cut my strip double width so i can fold it, it gets bulkier quicker to fill up the wreath} & begin threading it onto the wire


the nex part can be done several ways...in the wreath pictured above it was a simple matter of folding...lots of folds :)
on this one i am folding at a right angle every time before i poke it on for a more textured effect.


once you've done 3 or 4 folds, add 2 or 3 petals, they just slot in nicely between the other folds.
to add the petals, i pinched it not quite in half, but so that it went onto the wire twice, & there was still most of the petal to be seen...im not sure how to explain it but its quite simple :s
the pointy part at the bottom of the leaf should be folded up towards the middle, & this double over portion is the part you thread onto the wreath.


then push all the fabric up to the other end & continue until you filled the wreath.


next is embellishing...
i used two fabric hearts, which i sewed together using single feather stitch, but i'll show you the end result in part two which i'll do ASAP :) such lovely wishes for you all!!!


****************************************************************************************